| [ << Installing ] | [Top][Contents][Index] | [ Tutorial >> ] |
| [ < Graphical setup under Windows ] | [ Up: Installing ] | [ Command line setup > ] |
1.3 Graphical setup under macOS
Download LilyPond for macOS from Download. This is an archive called lilypond-x.y.z-darwin-x86_64.tar.gz (where “darwin” means it’s for macOS), for example lilypond-2.25.31-darwin-x86_64.tar.gz. In the Finder, extract this archive. Place the resulting directory lilypond-x.y.z-darwin-x86_64 into a permanent location; the actual folder doesn’t matter, you just need to put it somewhere you won’t move it afterwards. For example, you could choose your home folder.
After this, download the latest release of Frescobaldi from the project’s download page (the image refers to version 3.1.3, which is not necessarily the newest one). Choose the .dmg file.
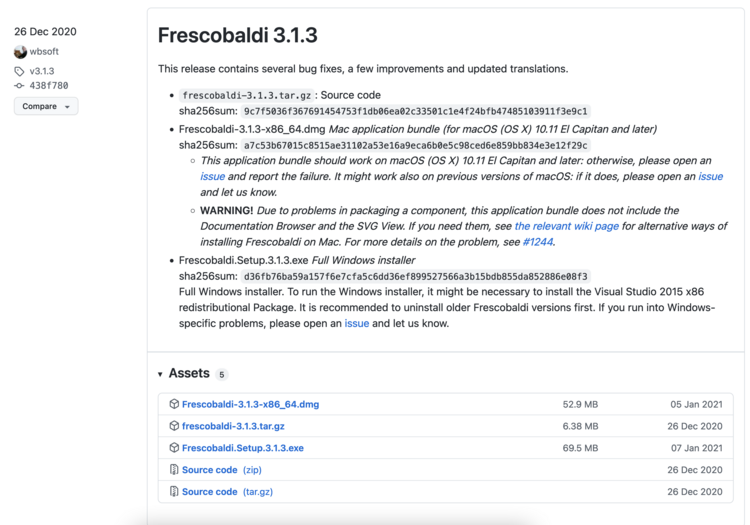
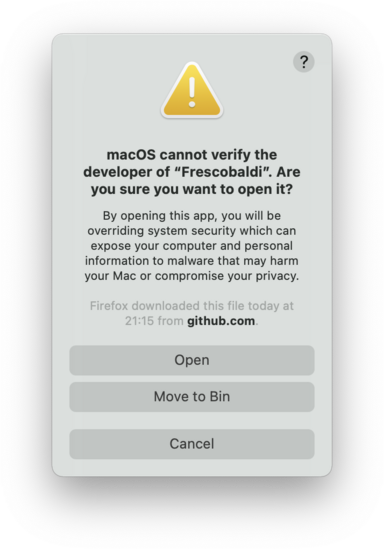
In the Finder, double-click on the file to run the installer. At this point, you might encounter a problem:
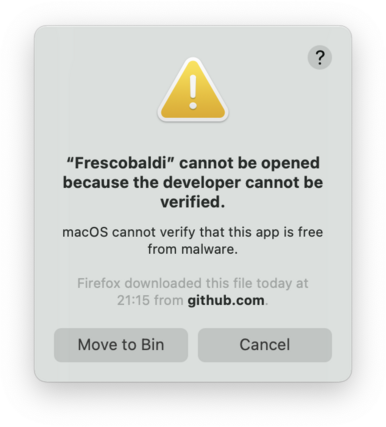
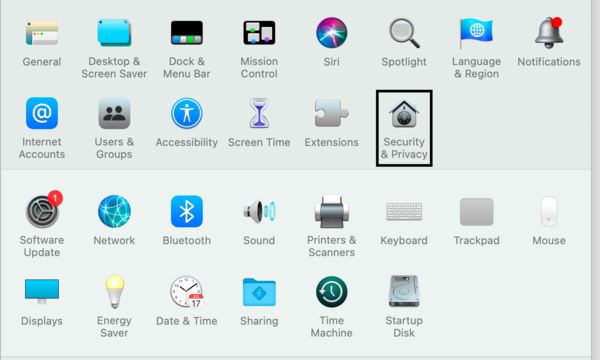
This is because Frescobaldi is developed independently from Apple. Nevertheless, it is totally secure software, but you have to tell Apple so. To do this, you first need to click “Cancel”. After having clicked “Cancel”, open the “System Preferences” app and select “Security & Privacy”.
Then click “Open Anyway”.
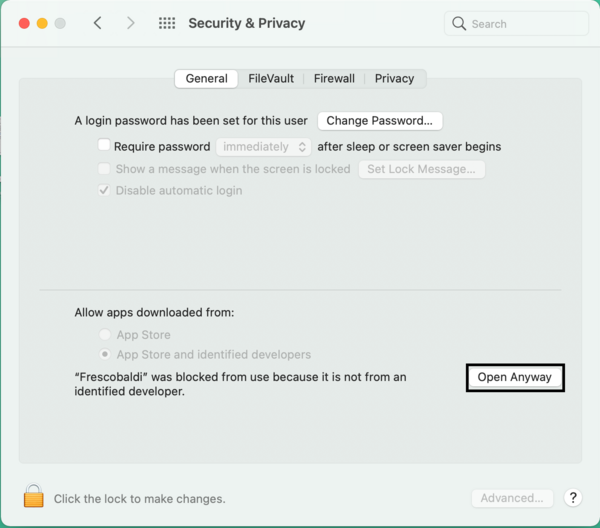
This leads to a new security warning. This time, you have the option to accept. Select “Open”. Again, do not fear: Frescobaldi is completely secure for your system.
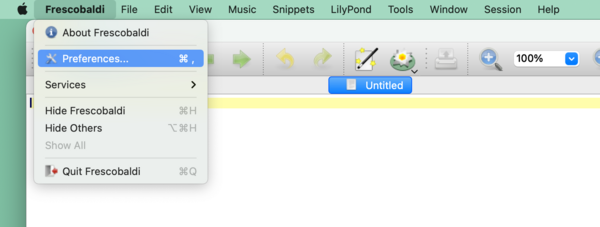
Frescobaldi is now open. Find the Preferences.
Click on “LilyPond Preferences” on the left.
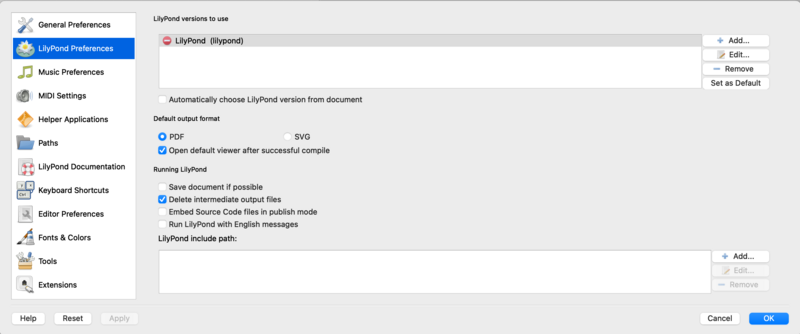
Click “Edit” on the right. This opens a new window:
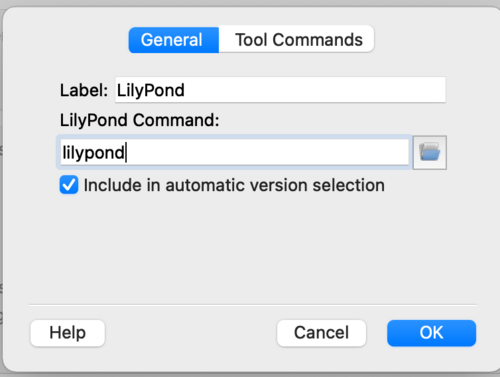
Click on the “folder” icon. A Finder window opens. Navigate to the lilypond-x.y.z-darwin-x86_64 folder you saved earlier. Inside it, find lilypond-x.y.z, then bin, and finally lilypond.
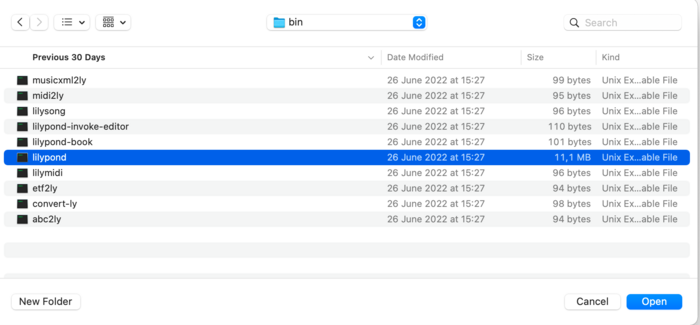
When you press “OK”, a new security warning about LilyPond will likely appear. Again, first click “Cancel”, then enable LilyPond in the preferences, and redo the procedure to select lilypond in the Finder.
Now click “OK” to everything until you are back to the main Frescobaldi window. Enter this simple file in source view on the left:
\version "2.25.31"

{ c' }
Click on the button with the LilyPond icon to compile the file, or use the Control-M keyboard shortcut. For a third time, the system will warn you about security, this time with “gs” (GhostScript). Once more, go to the System Preferences and enable the program to be executed.
Finally, the next compilation run will work and you will find a minimal score.
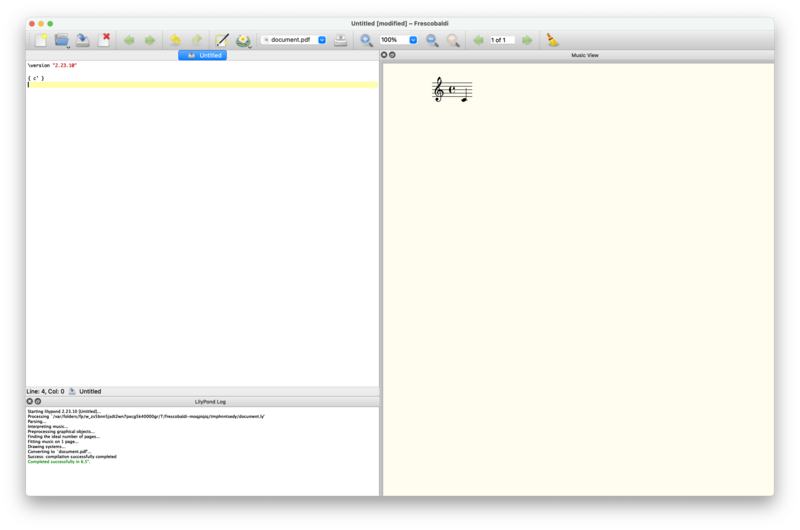
Congratulations, you have just created your first music sheet with LilyPond! Now continue with the Tutorial to learn more about LilyPond’s syntax.
| [ << Installing ] | [Top][Contents][Index] | [ Tutorial >> ] |
| [ < Graphical setup under Windows ] | [ Up: Installing ] | [ Command line setup > ] |