| [ << Installing ] | [トップ][目次][インデックス] | [ チュートリアル >> ] |
| [ < Graphical setup under GNU/Linux ] | [ 上へ : Installing ] | [ Graphical setup under macOS > ] |
1.2 Graphical setup under Windows
Download LilyPond for Windows from
Download. The file will
a ZIP archive called
‘lilypond-x.y.z-mingw-x86_64.zip’ (where
“mingw” means it’s for Windows). Extract this in the file
explorer. Place the resulting directory
lilypond-x.y.z-mingw-x86_64 in a
permanent location; the actual folder doesn’t matter, you just
need to put it somewhere you won’t move it afterwards. For
example, you could choose your home folder.
After this, download the latest release of Frescobaldi from the project’s download page. Choose the ‘.exe’ file.

Double-click on the downloaded file in the file explorer. This launches the setup wizard.
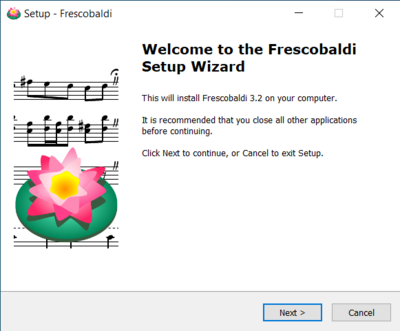
Accept the license and install Frescobaldi using the wizard. You will find a startup screen like this:

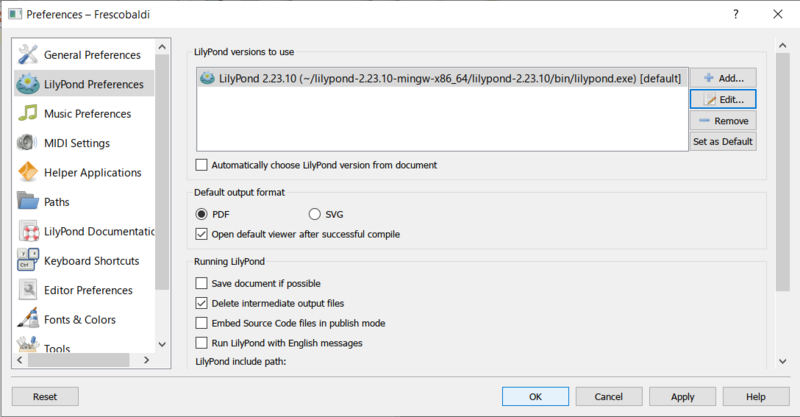
Navigate to the Frescobaldi preferences.
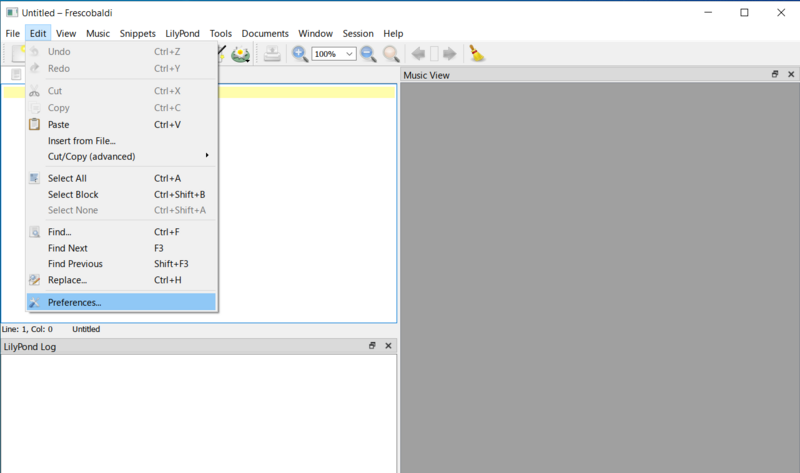
Navigate to “LilyPond Preferences” on the left.
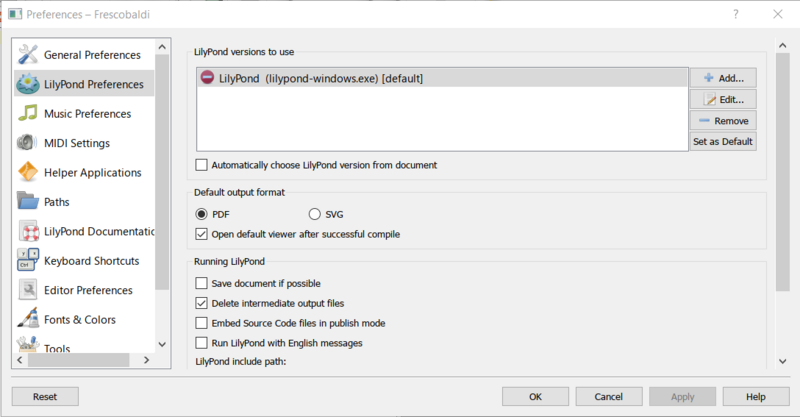
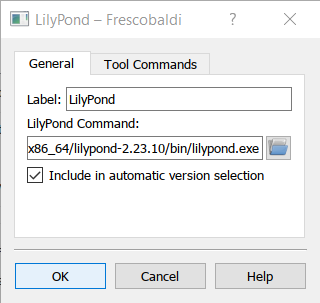
Click “Edit” on the right. This leads to a dialog for choosing the LilyPond executable.
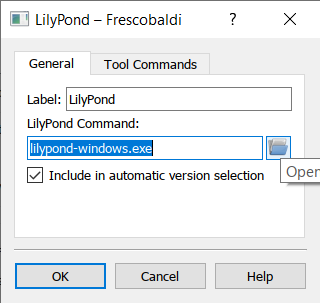
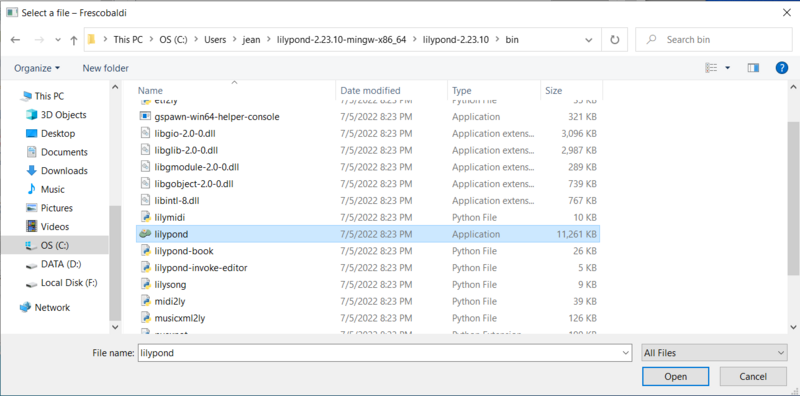
Click on the folder icon and navigate to the
lilypond-x.y.z-mingw-x86_64 folder you previously created.
Inside this folder, open ‘lilypond-x.y.z’, then ‘bin’,
and finally select ‘lilypond’.
Now click “OK”.
Click “OK” again.
Type this simple file in the window:
\version "2.23.82"

{ c' }
Compile it with Control-M or using the “LilyPond” icon. A minimal score appears.
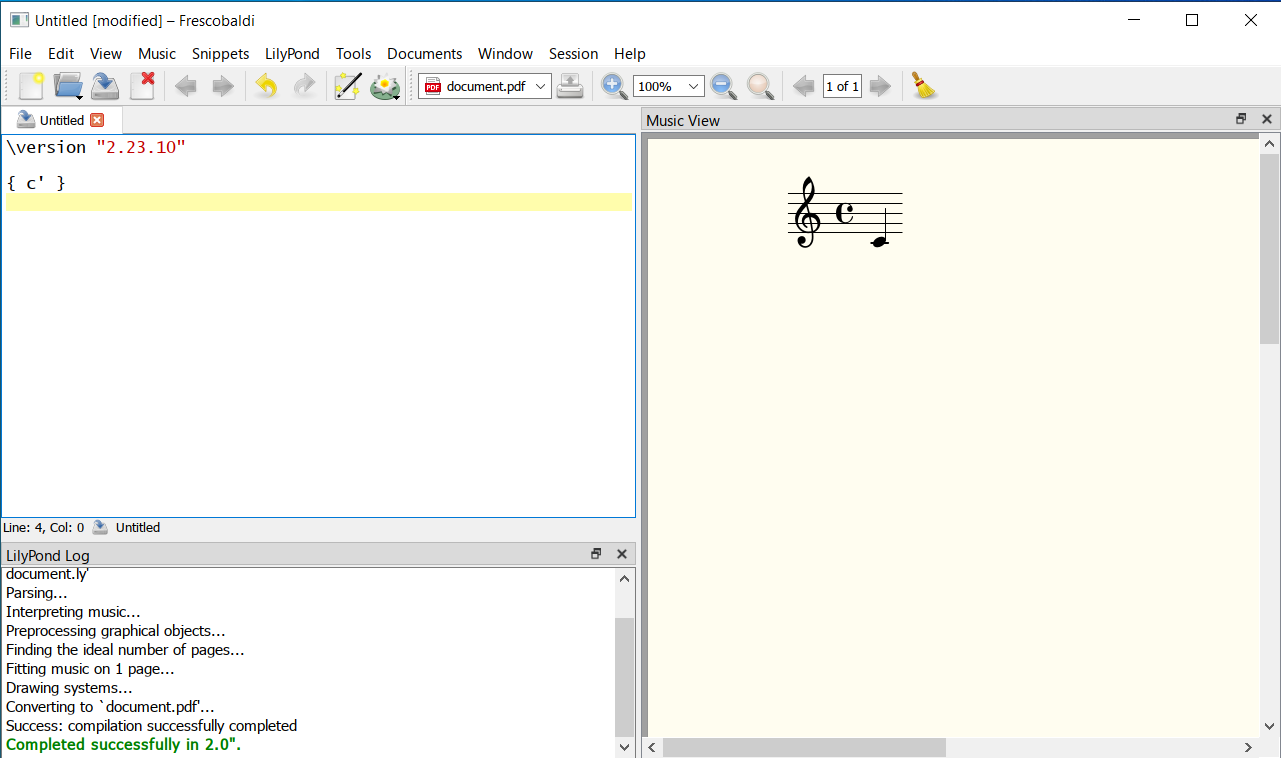
Congratulations, you have just created your first music sheet with LilyPond! Now continue with the チュートリアル to learn more about LilyPond’s syntax.
| [ << Installing ] | [トップ][目次][インデックス] | [ チュートリアル >> ] |
| [ < Graphical setup under GNU/Linux ] | [ 上へ : Installing ] | [ Graphical setup under macOS > ] |